|
Blue Hills Observatory (Click on images to enlarge) |
|
|
|
|
| I had built a
portable observatory, Portable
Observatory, but I always wanted a permanent one.
Around 1980 I started looking for land in Arizona, where I
live. I had seen some potentially nice lots that would be
protected from light pollution for a very long time, but I
chose a subdivision about 90 north of central Phoenix,
Arizona, about five miles south of Prescott Valley. At the
time it had good dark skies but the area is experiencing
tremendous growth and light pollution is becoming a
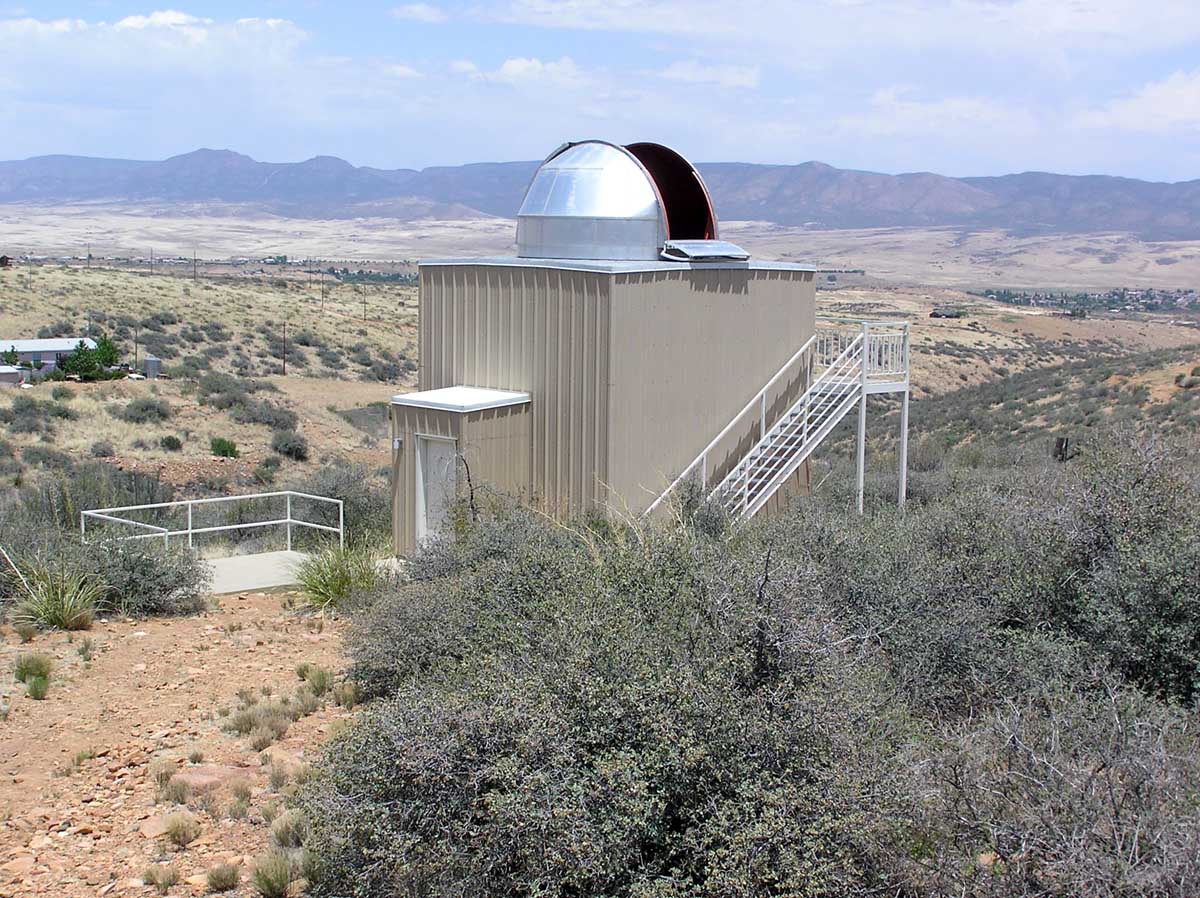
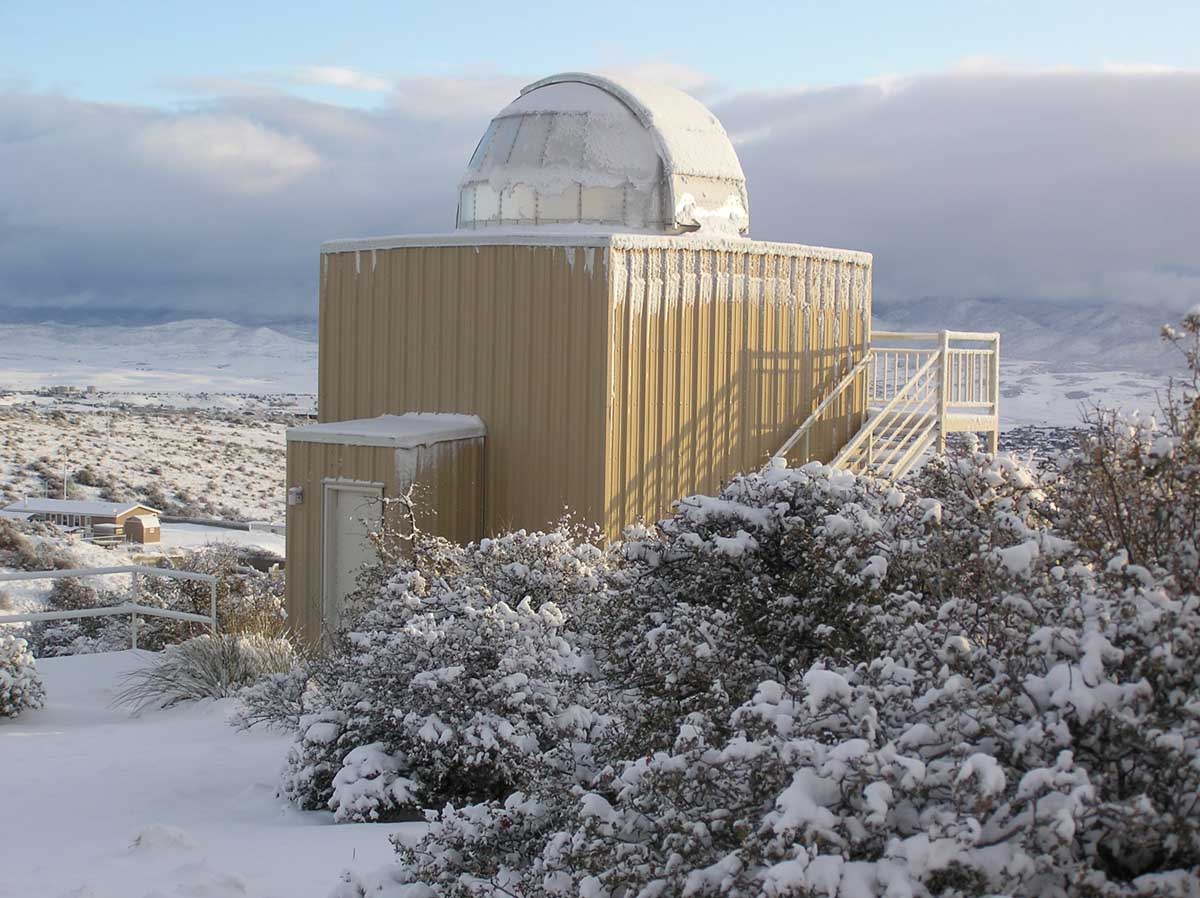
problem. I purchased a lot in 1981 in a subdivision called Blue Hills, hence the name of the observatory. The parcel is 4.86 acres in size, is at an elevation of 5,140 ft., and is about seven miles, in a straight line, south east of Prescott. I obtained a construction permit In 1983 and started work on the observatory that year. In 1983 the telescope footing (a 5’x5’x5’ cubic volume of concrete) and the footing for the building were poured. That same year the stem wall was laid and the floor poured. I had expected to get the observatory, including building the dome, done in time for Halley’s comet in 1985. What a gross underestimation that was, as all my projects are. It wasn’t until 1989, driving the 80 miles from Phoenix to work on weekends, holidays, and vacation time, that the dome was hoisted on top the building and I was able to use it, but even then I had not yet built the outside stairs and landing to the second floor. The main reason it took so long is that, except for the concrete, work I did all the work by myself. The building is 16x16 feet and two stories high. 2”x6” Douglas Fir studs were used for strength, and the building was sheathed with ¾” plywood, covered with #30 felt paper, and then surfaced with R-panel. Because I worked alone, I could not raise a nailed together wall frame, the customary practice. So I bolted together the building from the floor up with ¼” bolts and brackets I made out of 1”x1/8” flat iron. In the image to the right below you can see the brackets bolted to the base plates and from this you can get an idea on how the building was constructed from the floor up. The result, I think, is a very strong building that should withstand extremely high winds. The 32 inch square pier is made of 8x8x16 inch cinder blocks. The blocks were reinforced with #3 rebar and filled with grout, but The 16x16 inch center hole (see the image to the left below) was not filled. I got the idea for this aspect of the block pier from a visit to one of the professional observatories. This pier is about 12 feet high but is so rigid that I can kick it very hard and get hardly any movement in the field of view of the telescope. |
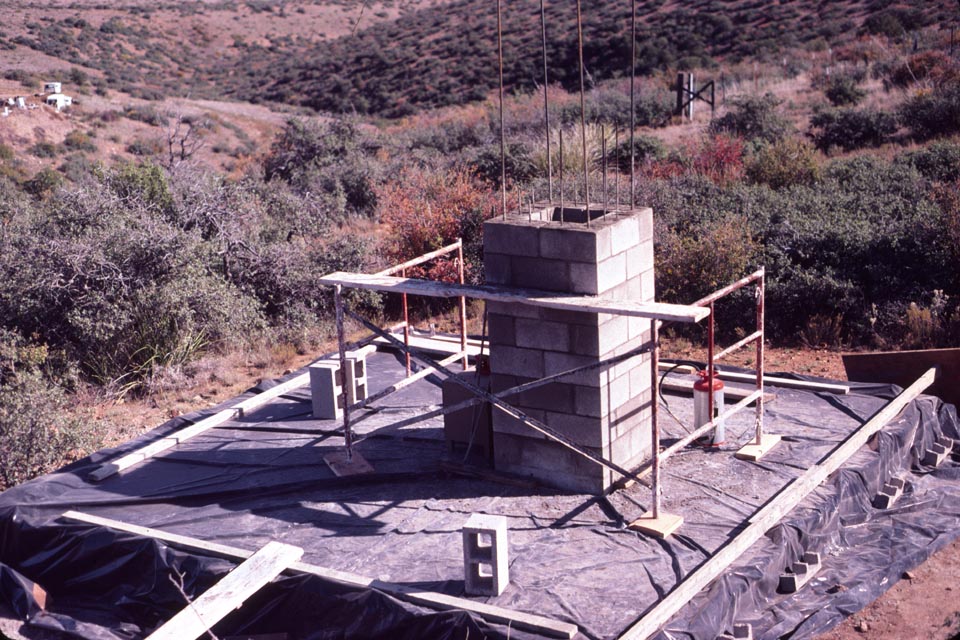 #3 rebar and
grout filled the block holes. The center hole formed was
not filled. One #5 rebar at each corner (as specified by
Dick Lines, a civil engineer and photometrist) anchors
the pier to the 5'x5'x5' concrete footing. #3 rebar and
grout filled the block holes. The center hole formed was
not filled. One #5 rebar at each corner (as specified by
Dick Lines, a civil engineer and photometrist) anchors
the pier to the 5'x5'x5' concrete footing. |
 The 2"x6"
studs and all other Douglas Fir planks were bolted
together with 1/4" bolts and brackets I made out
of 1"x1/8" flat iron. I chose Douglas Fir because
of its strength. The 2"x6"
studs and all other Douglas Fir planks were bolted
together with 1/4" bolts and brackets I made out
of 1"x1/8" flat iron. I chose Douglas Fir because
of its strength. |
| Originally, the dome was
intended to be 16 feet in diameter, but because I had
never designed and built a dome before (and in the process
having to learn how to gas weld) I decided to build a
smaller one first that is 11 feet and four inch in
diameter. This was intended to be a quick test to see how
it would go. However, it took such an immense amount of
time to build, about two years of weekend work (again I
grossly underestimated the time a project would take) that
the prototype became the permanent dome. The dome frame is
constructed from 1.5 inch, one inch, and ¾ inch square
steel tubing, all with 1/16th inch wall thickness. All the
rings, made of 1” square steel tubing, and the 1.5”
diameter split ring for the slit opening were rolled into
circles by a commercial metal fabricator. The entire frame
was welded together with a gas welder. I welded all four
sides of each piece which in retrospect may have been an
overkill, but for sure the dome won’t come apart. A plate
of ¼ inch thick 6061-T6 aluminum was cut into arcs with a
sawzall and bolted into place under the bottom two rings
that are the base of the dome. The aluminum plate is the
running surface for the wheels that are attached to the
building and support the dome. The outside sheeting of the
dome is out of 0.025” 3003 aluminum sheeting. The sheet
sections were joined together by way of a Pittsburgh joint
using a tool my machinist friend Bill Loumaster made for
me. The sheets were pop-riveted to the steel frame, but
after a couple years they started leaking rainwater. I had
to go up on top the roof of the observatory and drive out
the central mandrel of each pop-rivet and fill the hole
with silicone rubber. The following images and text for
each should be self explanatory. |
 The Roof truss design to support the dome. The lower story has standard 8 foot wall studs. The top story has 6' wall studs. The second story floor is made of 2"x10" floor joists covered with 3/4" plywood. Note the steel door jams. |
 I wanted at
least a six foot door to get into the observatory. This
meant the walls had to be at least six feet high. I had
to construct an elevated platform, 21" above the floor
and surrounded by wood railings so I don't fall off at
night. It takes three steps to reach the platform. I
still am restricted to the sky greater than eight
degrees above the horizon. I could have made the
platform even higher, but being able to get to the
horizon is not important to me. I wanted at
least a six foot door to get into the observatory. This
meant the walls had to be at least six feet high. I had
to construct an elevated platform, 21" above the floor
and surrounded by wood railings so I don't fall off at
night. It takes three steps to reach the platform. I
still am restricted to the sky greater than eight
degrees above the horizon. I could have made the
platform even higher, but being able to get to the
horizon is not important to me. |
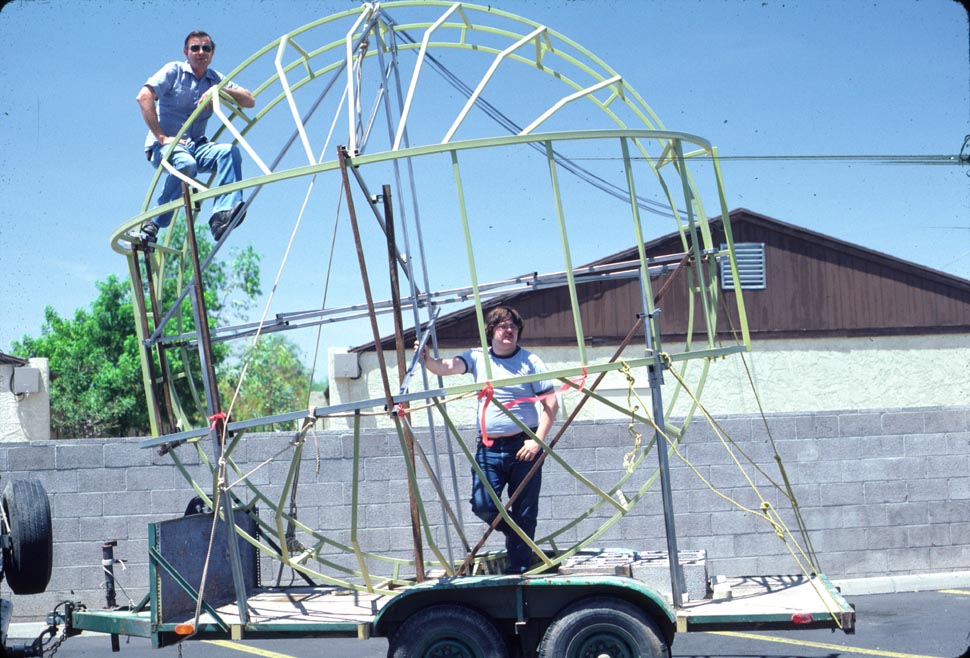 I started
building the dome in the back yard in Phoenix of a
friend's home, George Metro. His wife was very patient.
About a year later he sold his house and I had to move
the dome to my observatory site. The two friends helping
me are Bill Loumaster to the left and Tom McGrath. Bill
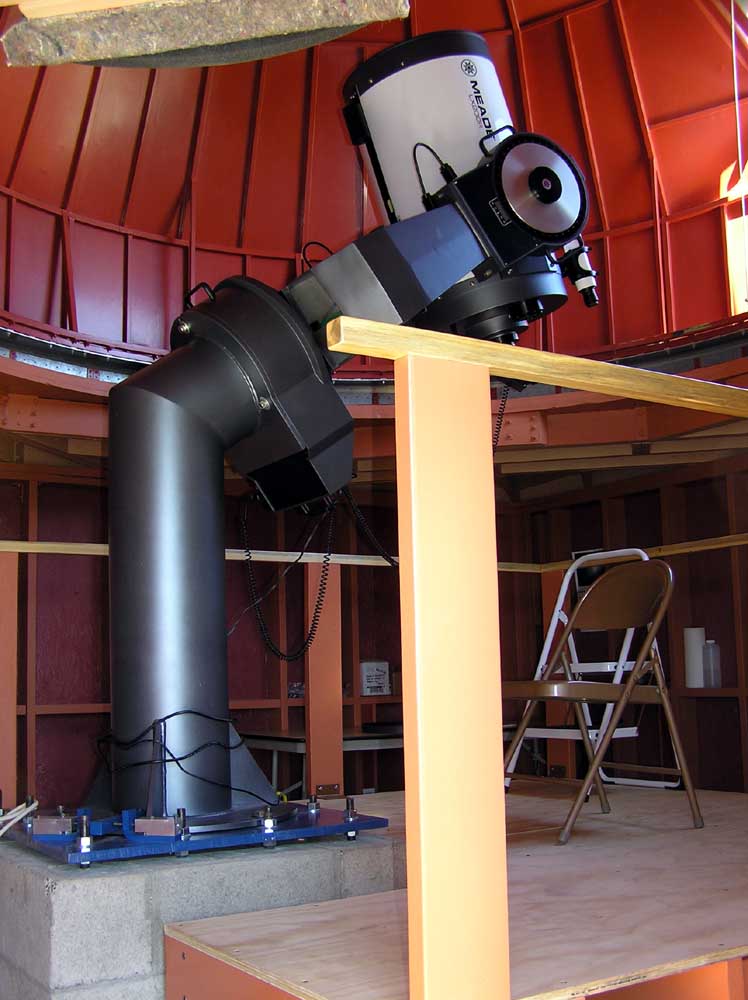
made my 12.5" Dall-Kirkham
telescope. I started
building the dome in the back yard in Phoenix of a
friend's home, George Metro. His wife was very patient.
About a year later he sold his house and I had to move
the dome to my observatory site. The two friends helping
me are Bill Loumaster to the left and Tom McGrath. Bill
made my 12.5" Dall-Kirkham
telescope. |
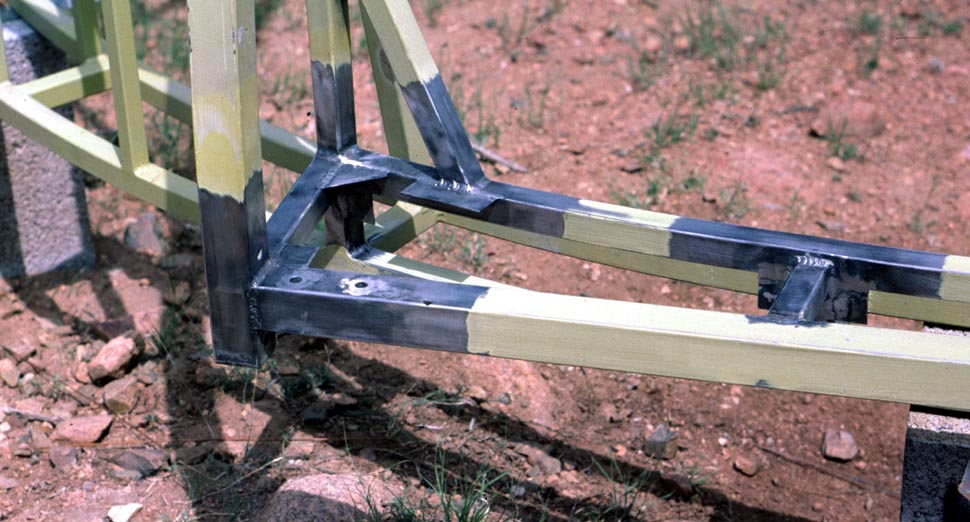 This shows
some of the detail involved in building the frame. To
the bottom of the double railed base was attached the
1/4" 6061-T6 aluminum plate. Metal tabs had to be welded
at some corners so the aluminum sheeting could be
adequately weatherproofed with silicone rubber. Note
also that all bolt holes were sleeved to prevent
moisture from leaking into the tubing. This shows
some of the detail involved in building the frame. To
the bottom of the double railed base was attached the
1/4" 6061-T6 aluminum plate. Metal tabs had to be welded
at some corners so the aluminum sheeting could be
adequately weatherproofed with silicone rubber. Note
also that all bolt holes were sleeved to prevent
moisture from leaking into the tubing. |
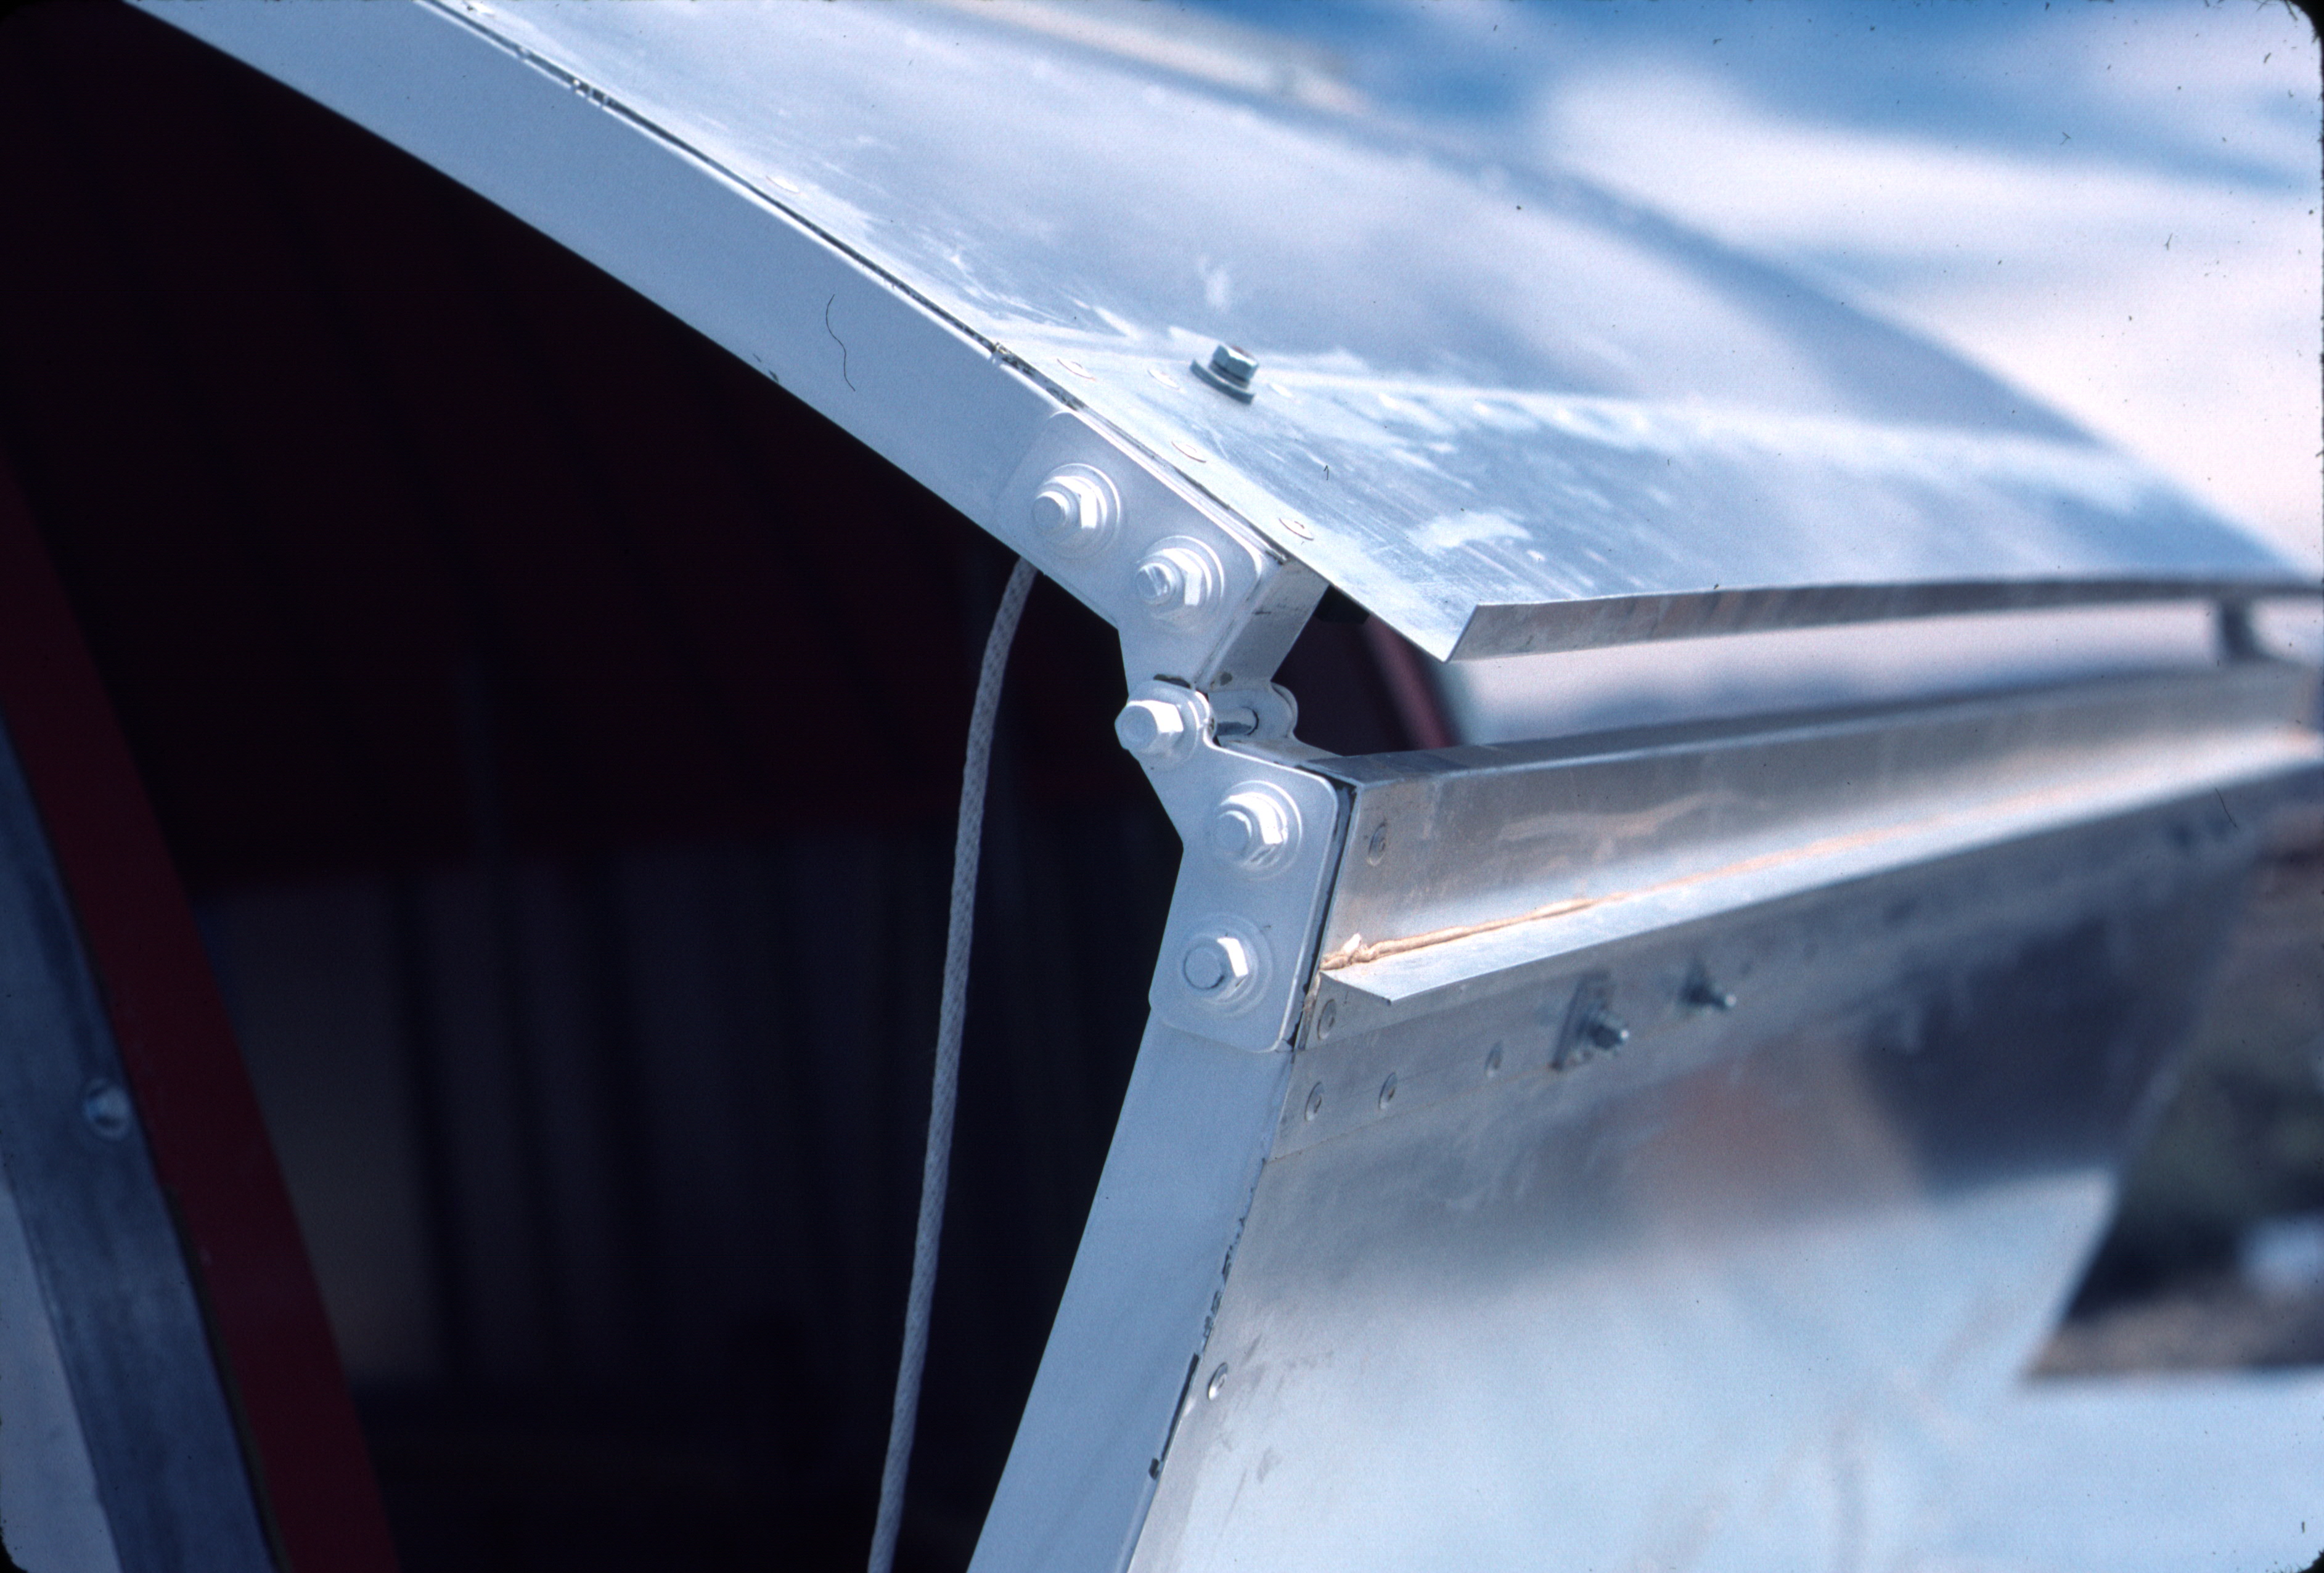 Weather
proofing the Weather
proofing the bend in the drop down shutter. The rope is used to lower and close the shutter. The hinges for the shutter had to be made, i.e., I could not go to a hardware store and buy them. Nearly everything for the dome was not standard equipment and had to be made by me. |
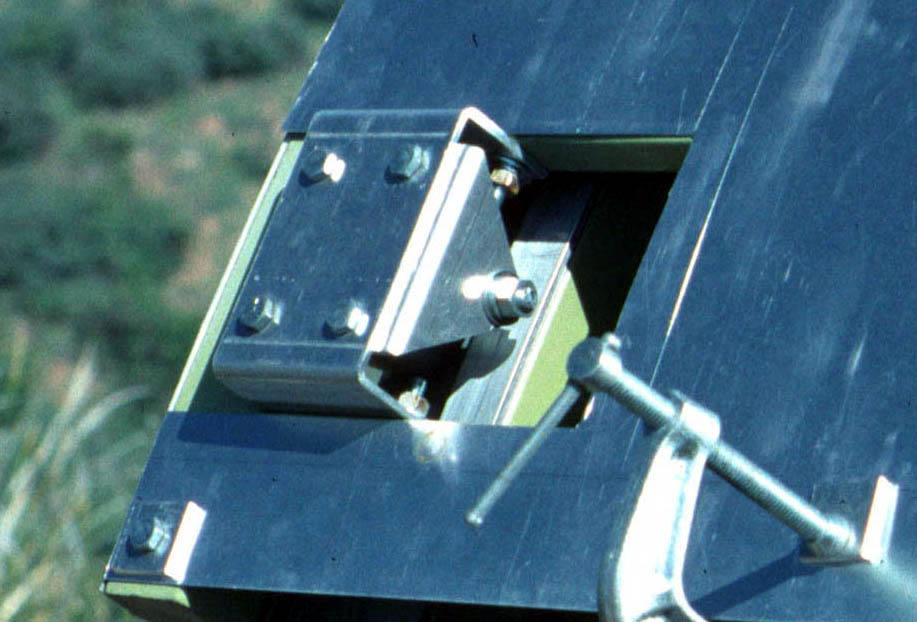 This illustrates the aluminum housing that was fabricated for one of the wheels of the roll over shutter. |
| Page 1 of 2 Go to page 2 Home Page |